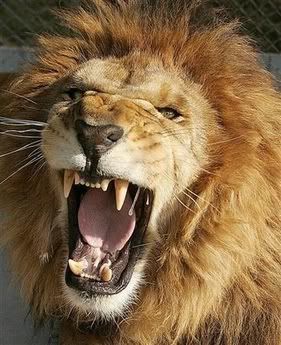
First things first, find good reference! It's always important to use reference when you are drawing, especially if you are drawing something realistic. The human eye can easily spot mistakes in proportion and anatomy, so if you can, always try to find good reference. However, whatever you do don't trace! Instead use a lot of different photos, but loosely, see it you can just take elements, proportions, shapes and textures from the photo, rather that exactly copying the image, eg an ear here, examine the shape of the eyes. I'll run you through this process.
I did a light sketch of the general shapes of the Lion's head. Big, geometric shapes are best. When drawing his mane I was careful NOT to go into detail, but instead to capture the shape of it. I have fallen into the trap of detailing the hair much to early on many times before, it's never helpful. (the picture below has been contrast adjusted so you can see the original lines, but in reality, they weren't so dark.)


Next I began inking the drawing. I used my Zeta Pad (a kind of tracing paper that can hold ink very nicely) to trace over my original drawing, with careful and considered lines. I used a very nice Ink pen I bought at a Japanese shop in Auckland, it works very much like a brush & ink, and was only a couple of dollars. I am going to be very sad when it runs out :3
However you can use a brush and indian ink to achieve the same kind of results. Or just normal felt markers, but make sure you use an ink sensitive paper, like a Zeta pad, or hot-press illustration board. Even mounting board would be fine, anything that can hold ink and not bleed. This image below is straight from the scanner and unadjusted in Photoshop.


Complete! This drawing can be coloured in Photoshop or illustrator or left in Black & White, it can be converted to a vector if you like. I will be using this drawings in further tutorials, including an upcoming tutorial on the very best way to select & colour a linework in Photoshop.

No comments:
Post a Comment